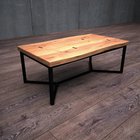
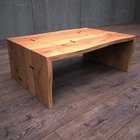
Refinishing a wood table can breathe new life into a piece of furniture that may have old, worn finishes or damage from water rings. By refinishing, you can restore wooden furniture to its former glory. This process allows you to remove stains, and smooth surfaces, update finishes, and protect the wood from future damage. With some basic tools, patience, and step-by-step instructions, you can make your sanded table look brand new.
Assessing the Table’s Condition
Before beginning the refinishing process, thoroughly examine your dining table to identify any problem areas or defects. Check for:
- Water stains: Inspect for white rings or black water stains on the surface, which occur after the liquid is left to sit.
- Other imperfections: Look for scratches, gouges, or areas where the finish is cracking or peeling.
- Type of wood and finish: Determine what kind of wood your table is made of, along with the current finish. This impacts the products and techniques used for refinishing.
Preparing Your Workspace
Set up your workspace in an area that allows for good airflow and light. Lay down plastic sheets or tarps to protect surrounding surfaces from drips and spills of paints or chemicals. Clear ample space to work around all sides of the table. Gather all necessary supplies before starting.
Stripping Away Old Finishes
You’ll need to completely remove the existing finish before applying a new stain or protective sealant. Two options for stripping include:
- Chemical strippers: Apply a liquid chemical agent to dissolve the finish. Use heavy-duty products for thicker build-ups. Exercise safety precautions against inhaling fumes.
- Sanding: Use a power sander or sandpaper to manually scrape off finishing layers. Start with a coarser 80-100 grit working up to 220-400 grit for a smooth surface.
Eliminating Water Stains
Understanding and Tackling Different Stain Types
Water wood table stain can be white or black. White marks are usually superficial, while black stains indicate deeper damage.
Effective Stain Removal Techniques
- For white stains, apply a mixture of baking soda and water, then gently rub.
- For black marks, lightly sand the affected area and apply a wood bleach.
Preventing Future Water Damage
- Always use coasters under beverages.
- Wipe spills immediately to prevent staining a wood table.
Smoothing and Sanding the Surface
Proper sanding creates an evenly smooth foundation for your new finish. Use varying grit sandpaper to gently sand the wood grains. Work progressively from lower to higher grits like 80, 150, and finally 220-grit. Always sand along the wood grains rather than across. Thoroughly wipe away sanding dust using a lint-free cloth.
Choosing and Applying Finishes
Select a finish option that achieves your desired aesthetic for refinishing the table. Oil-based wood stains offer deeper penetration highlighting grain patterns, while gel stains adhere more to the surface. Varnishing a table with polyurethane or lacquer creates resilient barriers with varying transparency and sheen levels. Consider a vintage-inspired look using shellac resin. Tung and linseed oils also subtly enhance wood tones.
Always test products first on an inconspicuous spot before full application. Carefully follow all manufacturer instructions for use including proper brush type, application method, dry times, compatibility with other finishes, and surface preparation guidelines.
Use high-quality synthetic bristle brushes suited to the finish type rather than foam brushes prone to visible streaking. Apply a minimum 2-3 thin, even coats gently sanding between each layer as needed to ensure proper adhesion over time. Strictly adhere to all listed drying and curing times before adding extra coats, or tacky, weak finishes can result losing luster and protection.
Sealing and Protecting
Once your stain or finish coats fully cure, adding a protective sealant will shield the woodwork from wear and tear. Polyurethane is commonly used over oil and gel marks. Use natural oil-modified products for protecting water-based finishes. Consult your stain’s recommendations for compatible sealants.
Apply at least 2-3 layers according to manufacturer guidelines allowing the full 24-hour drying duration between each application. Avoid humidity and maintain ideal room temperatures during the curing phases. Use foam brushes for polyurethane to prevent bubbles from overly stiff-bristled brushes. Lightly sand then wipe clean with a tack cloth before adding extra coats.
To uphold protection after sealing, immediately wipe spills and condensation rings with a soft lint-free cloth. Use table mats, linens, or placemats to prevent hot dishes or liquids from damaging the finish. Dust frequently with a soft cloth and apply polish sparingly when needed. Harsh commercial cleaning products can degrade sealant over time.
Final Steps to Reassembly
Once fully cured, reattach any detachable leaves or hardware you’d previously removed using the manufacturer's hardware. Finally, meticulously clean the entire surface using a mild polish and lint-free cloth. Stand back and admire your beautifully revitalized wood table, restored to its former glory!
Closing Thoughts
From properly preparing your workspace, stripping away old finishes, repairing damages like water marks or scratches, applying new stains and seals, all the way through to reassembling - follow this comprehensive process to entirely transform tired-looking, worn wood furniture pieces. With some dedicated time and effort, you can make them look brand new again.

