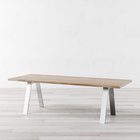
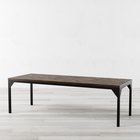
Wood surfaces like tables and furniture often get sticky from spills, humidity, or using improper cleaning products. Sticky residues can damage the beauty and longevity of timber if left untreated. Knowing how to clean a sticky wood table or how to remove sticky residue from wood furniture is key to preserving its beauty.
This article provides detailed guidance on how to clean a sticky wood table. It covers proper identification, gear, step-by-step processes using mild cleaners and polishes, preventive care, and when to seek professional help for restoring sticky lumber surfaces. Follow these handy tips to reveal the natural radiance of your natural furnishings.
Identifying Wood Type and Finish
Differentiating Hardwoods vs. Softwoods
Hardwoods like oak, maple, and mahogany are naturally moisture-resistant with closed grains, making them less prone to stickiness than soft, porous lumber like pine, cedar, and redwood. Understanding your timber type guides appropriate cleaning methods.
Wood Finish Characteristics
Common wood finishes include varnish, lacquer, wax, oil, shellac, and polyurethane. Consider the finish’s water and chemical resistance when selecting cleaners. For example, wax and oil finishes are easily marred by liquids. Know your finish to prevent damage during cleaning.
Why Proper Identification Matters
Using overly harsh chemicals risks bleaching, discoloration, or etching. Erring on the gentle side is wise until the wood type and finish are confirmed. Record discoveries underneath or behind furniture to inform future care.
Preparing the Cleaning Area
Clearing Surfaces
Remove objects, tablecloths, and chairs from the immediate sticky area for unencumbered cleaning access. For large surfaces, work in sections to prevent re-soiling of cleaned areas.
Assembling Cleaning Materials
Gather a soft lint-free cloth, distilled white vinegar, mild dish detergent, clean water, microfiber cloths, wood oil/polish and sealable plastic bags for tackling sticky spots. Have rubber gloves and eye protection on hand if using chemical cleaners.
Safety First
Don protective gear, ventilate rooms, cover nearby electronics/valuables, and test cleaners in inconspicuous spots before widespread use. Avoid slipping hazards by promptly cleaning spills from floors.
Step-By-Step Cleaning Process
Gentle Dusting
Use a dry microfiber cloth to gently lift any surface debris or crumbs trapped in sticky residues. Switch to new areas of the cloth as it becomes soiled for optimum dust removal. Avoid rubbing debris into the finish.
Testing Cleaners
Select your cleaning solution, dip a cloth corner into the mix, and then gently rub a hidden area of wood for 30 seconds. Allow to fully dry checking for white marks or discoloration that signal lumber incompatibility.
Mild Cleaning Mixtures
For simple sticky spots, mix a solution of 1⁄2 cup warm distilled white vinegar, 1⁄2 tsp clear dish detergent, and 2 cups water. Dip a soft lint-free cloth into the mix and wring out excess liquid before gently wiping the sticky area using straight back-and-forth motions to lift residue without rubbing it deeper into the hardwood grain. Rinse the cloth frequently to prevent redepositing grime.
Tackling Stubborn Gunk
For stubborn residue like chewing gum or adhesive, place a plastic bag filled with ice on the sticky spot for 30 minutes to harden the gunk. Then gently pry off the solidified mess with a plastic putty knife, working slowly from the outside edges inward to avoid surface scratches. Wipe away any leftover stickiness with vinegar solution.
Rinsing and Drying
Run a clean damp cloth over wood using minimal pressure to lift cleaning solution residues without damaging the finish. Thorough drying is critical to prevent bubbling or peeling topcoats – allow a minimum of 72 hours at normal humidity. Position a fan to accelerate drying time if needed.
Polishing for Protection
Once fully dry, apply a thin coat of timber polish or oil suited for your finish type (tung oil for natural woods, polish with UV protectants for lacquer finishes) massaging gently using small circular motions. Buff lightly with a microfiber cloth for a luminous satin patina. Re-oil periodically per product instructions.
Preventing Sticky Situations
Use Table Mats and Coasters
Protect wood surfaces from condensation rings, spills, and gunk by using table mats and coasters religiously. Plastic, cork and felt mats prevent scratching. Absorbent coasters soak up drips before they leave sticky residues.
Establish Regular Care Routines
Get into the habit of quickly wiping down wood with a microfiber cloth after meals or craft sessions – small spills cause big headaches if allowed to dry unchecked! Schedule seasonal oiling, polishing, and inspection to keep lumber furniture in peak form.
What to Avoid Using on Wood
Skip abrasive scouring pads, steel wool, and alkaline cleaners containing ammonia or bleach that mar wood finishes. Overwetting timber causes damage – wring clothes thoroughly. Oil soaps leave greasy film buildup dulling the surface over time.
Seeking Professional Help
If dealing with sentimental heirloom furniture or costly exotics like teak or mahogany, consider hiring a professional. This is especially true for pieces with intricate inlays or carvings. Engage a professional hardwood refinisher to safely clean, restore, and protect the natural beauty. This approach is advisable when facing stubborn stickiness beyond your skill level, ensuring preservation for posterity.
Cleaning and Caring for Different Wood Types
Here are some lumber-specific tips to help you maintain the natural beauty of your cherished wooden items:
- Oak: Oak is known for its durability and prominent grain patterns. To clean oak wood, use a mild detergent solution and a soft cloth. Avoid abrasive cleaners that can scratch the surface. Periodic applications of oak-specific furniture polish can enhance its luster.
- Mahogany: Mahogany boasts a rich, reddish-brown hue. Clean with a mixture of water and a few drops of mild dish soap. Use a soft, damp cloth to wipe the surface, followed by a dry cloth to prevent water spots. Mahogany benefits from occasional oil-based wood polish for a glossy finish.
- Cherry: Cherry wood darkens with age and exposure to light. Clean gently with a solution of water and vinegar. Avoid direct sunlight to prevent excessive darkening. Cherry wood responds well to oil-based polishes for maintenance.
- Maple: Maple wood has a light, pale color and fine grain. Clean with a mixture of mild detergent and water, ensuring the cloth is only slightly damp. Use maple-specific wood polish to maintain its light appearance and protect it from stains.
- Pine: Pine is a softwood prone to dents and scratches. Dust regularly and clean with a mild detergent solution. Pine often benefits from natural beeswax or paste wax to protect the wood and enhance its warmth.
- Teak: Teak wood is naturally resistant to moisture and insects. Clean the teak with a mixture of water and mild detergent. To maintain its golden hue, apply teak oil periodically. However, if you prefer the silvery-gray patina, simply leave it untreated.
Remember that regardless of the wood type, always conduct a patch test in an inconspicuous area before using any cleaning or polishing products. This ensures that the chosen method is compatible with your specific timber finish.
Final Words
Knowing your wood furniture’s type and finish drives savvy sticky spot removal. Regular dusting and immediate cleanup of spills prevent sticky situations, while soft cloths, gentle cleaning solutions, proper drying, and protective polishing preserve the elegance of wood surfaces safely. By correctly identifying lumber furnishings and understanding appropriate cleaning methods for tackling sticky spots promptly, you can maintain the natural warmth and beauty of hardwood surfaces for years of enjoyment.

